
Introduction
There's a particular kind of magic that happens when you walk into your kitchen on a crisp autumn morning and hear the gentle bubbling of vegetables transforming themselves on your countertop. That soft fizz is the sound of billions of beneficial bacteria hard at work, turning your garden's summer abundance into tangy, probiotic-rich foods that will nourish your family through the colder months ahead.
Home vegetable fermentation is one of humanity's oldest preservation techniques, practiced for thousands of years across every culture that grew food. Yet somewhere along the way, we handed this simple art over to factories and forgot that our grandmothers knew how to do this with nothing more than salt, vegetables, and patience. The good news? Reclaiming this knowledge is easier than you might think.
In this comprehensive guide, you'll discover everything you need to start fermenting your garden vegetables at home. We'll walk through the fascinating science behind fermentation, explore essential equipment and techniques, and share foolproof recipes that transform humble cabbage into complex sauerkraut and crisp cucumbers into perfectly sour pickles. Whether you're looking to reduce food waste, boost your gut health, or simply capture the peak flavors of your harvest, home vegetable fermentation offers a rewarding path from garden bed to dinner table.
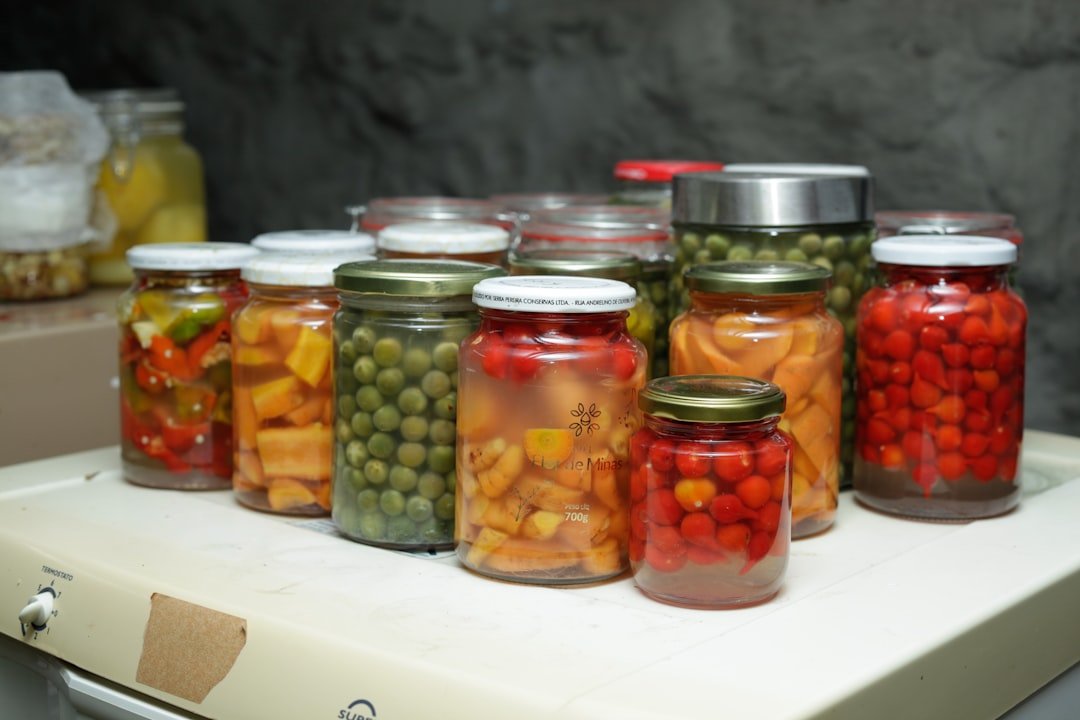
Photo by PROJETO CAFÉ GATO-MOURISCO on Unsplash
What is Home Vegetable Fermentation?
Home vegetable fermentation is the practice of preserving fresh vegetables through lacto-fermentation, a natural process where beneficial bacteria convert sugars into lactic acid. This ancient technique requires no special equipment, no canning knowledge, and no heat—just salt, vegetables, and time.
Unlike vinegar pickling, which relies on adding acid to preserve foods, lacto-fermentation creates its own preserving acid through bacterial action. The vegetables you harvest from your garden are already covered with Lactobacillus bacteria, the same beneficial microorganisms found in yogurt. When you create the right conditions—an oxygen-free, salty environment—these friendly bacteria flourish while harmful pathogens cannot survive.
The Science Behind the Bubbles
When you pack salted vegetables into a jar and submerge them in brine, you create an anaerobic environment. The naturally present Lactobacillus bacteria begin consuming the sugars in your vegetables, producing lactic acid as a byproduct. This acid gradually lowers the pH of your ferment, creating an inhospitable environment for spoilage organisms while developing the characteristic tangy flavor we associate with fermented foods.
The fermentation process typically moves through three distinct phases:
Phase 1 (Days 1-3): Various bacteria compete for dominance. You'll notice bubbles forming as carbon dioxide is released. The brine may become cloudy—this is completely normal and indicates active fermentation.
Phase 2 (Days 3-7): Lactobacillus bacteria take over, rapidly producing lactic acid. The pH drops significantly, and the distinctive sour flavor begins developing.
Phase 3 (Week 2 and beyond): Fermentation slows as acid levels increase. Flavors mellow and become more complex. The vegetables reach their peak preservation state.
| Characteristic | Lacto-Fermentation | Vinegar Pickling | Canning |
|---|---|---|---|
| Preservation Method | Beneficial bacteria create acid | Added vinegar provides acid | Heat kills all bacteria |
| Probiotic Content | High - living beneficial bacteria | None - bacteria killed by acid | None - bacteria killed by heat |
| Equipment Needed | Jars, salt, weights | Jars, vinegar, spices | Pressure canner, special jars |
| Heat Required | None | Often heated brine | High heat essential |
| Texture Result | Crisp, crunchy | Can be softer | Often softer |
| Flavor Profile | Complex, tangy, umami | Sharp, acidic | Varies by recipe |
| Shelf Life | Months refrigerated | 1-2 years sealed | 1-5 years sealed |
Why Fermentation Differs from Other Preservation Methods
What sets fermentation apart from other preservation techniques is that it's a living process. Your fermented vegetables contain billions of beneficial bacteria that continue to exist in a dormant state when refrigerated. When you eat these foods, you're consuming probiotics that can support your digestive health—something no canned or vinegar-pickled product can offer.
Fermentation also enhances the nutritional value of vegetables rather than diminishing it. The fermentation process increases the bioavailability of vitamins and minerals, creates new B vitamins, and breaks down compounds that can interfere with nutrient absorption. Your fermented cabbage may actually be more nutritious than the fresh head you started with.
Why Home Vegetable Fermentation Matters
In an age of industrial food production and year-round grocery store availability, you might wonder why anyone would bother fermenting vegetables at home. The reasons extend far beyond nostalgia—home fermentation offers tangible benefits for your health, your wallet, your garden's productivity, and the planet.
Health Benefits That Go Beyond Nutrition
The gut microbiome—the complex ecosystem of bacteria living in your digestive tract—influences everything from immune function to mental health. Modern diets, heavy in processed foods and light on fermented ones, have left many people with diminished microbial diversity. Each jar of homemade sauerkraut or fermented salsa delivers billions of beneficial bacteria directly to your digestive system.
Research continues to reveal the importance of these probiotic foods. Studies have linked regular consumption of fermented vegetables to improved digestion, reduced inflammation, enhanced immune response, and even better mental clarity. Unlike probiotic supplements, which contain a limited number of bacterial strains, traditionally fermented vegetables host diverse communities of beneficial microorganisms.
Solving the Harvest Glut Problem
Every gardener knows the feast-or-famine nature of vegetable production. One week you're nursing along tiny seedlings; the next, you're drowning in zucchini and desperately trying to give away cucumbers to neighbors who are avoiding eye contact. Fermentation transforms this annual challenge into an opportunity.
Unlike canning, which requires processing vegetables at their absolute peak and demands hours of hot, careful work, fermentation is forgiving. Those cucumbers that grew a bit larger than ideal? They'll make excellent half-sour pickles. The cabbage that's been sitting in the crisper for a week? Still perfect for sauerkraut. Fermentation extends your window for preserving and lets you work in small, manageable batches throughout the harvest season.
Environmental and Economic Advantages
Home fermentation requires no electricity for processing, no special packaging, and minimal transportation—just you, your vegetables, and some salt. The environmental footprint is remarkably small, especially when compared to commercially processed foods that travel thousands of miles and require extensive packaging.
Financially, the math is compelling. A quart of artisanal sauerkraut costs $12-15 at farmers' markets. A head of cabbage from your garden costs essentially nothing, and the salt needed for fermentation amounts to pennies. Even if you're purchasing vegetables, the savings are substantial, and the quality of home-fermented products typically surpasses commercial alternatives.
- Preserves harvest abundance without electricity or special equipment
- Creates probiotic-rich foods that support gut health
- Develops complex flavors impossible to achieve through other methods
- Requires minimal hands-on time compared to canning
- Produces no waste—brine can be used in cooking and salad dressings
- Connects you to thousands of years of food tradition
- Requires patience—ferments take days to weeks to complete
- Takes up refrigerator space for storage
- Results can vary based on temperature and vegetable quality
- Strong fermentation odors may be noticeable in small kitchens
- Initial learning curve for understanding salt ratios and timing
How to Ferment Vegetables at Home: Step-by-Step
Ready to start your fermentation journey? The process is simpler than you might imagine. With just a few basic supplies and fresh vegetables, you can create your first batch of probiotic-rich fermented foods this week.
Essential Equipment
You don't need specialized equipment to begin fermenting, though a few key items will make the process easier and more reliable.
Fermentation Vessels: Wide-mouth mason jars work perfectly for beginners. Quart-sized jars are ideal for most recipes. As you advance, you might invest in ceramic crocks or purpose-built fermentation crocks with water-seal lids.
Weights: Keeping vegetables submerged below the brine is crucial. You can use a smaller jar filled with water, a zip-lock bag filled with brine, glass fermentation weights, or even a clean rock. The key is consistent pressure that holds everything under the liquid.
Covers: During active fermentation, you need to allow gases to escape while keeping contaminants out. A loose lid, cloth secured with a rubber band, or an airlock lid all work well.
Kitchen Scale: While not strictly necessary, weighing your vegetables and salt ensures consistent results. A 2% salt solution (20 grams of salt per 1000 grams of vegetables) is the standard starting point.
Cutting Tools: A sharp knife, mandoline, or food processor speeds preparation of large batches.

Photo by Brandon Hoogenboom on Unsplash
The Universal Fermentation Method
Almost all vegetable ferments follow the same basic process. Master these steps, and you can ferment virtually any vegetable from your garden.
Step 1: Prepare Your Vegetables
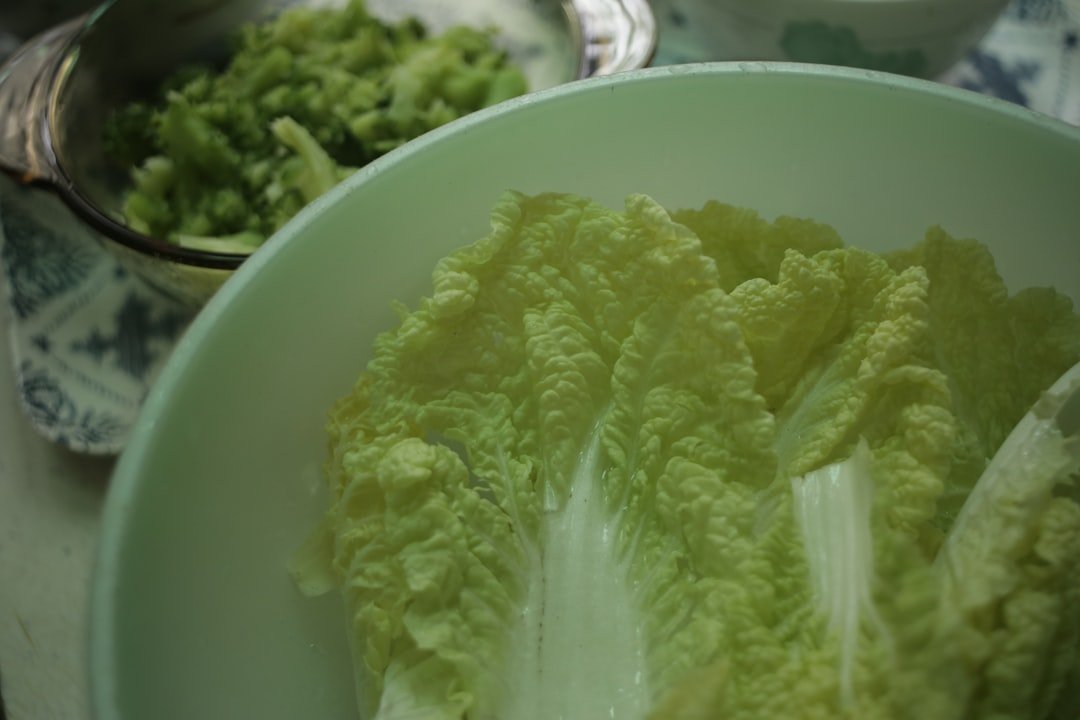
Wash your vegetables thoroughly but don't scrub aggressively—you want to remove dirt while preserving the beneficial bacteria on the surface. Avoid using chlorinated water for washing, as chlorine can inhibit fermentation. If your tap water is chlorinated, let it sit uncovered for 24 hours or use filtered water.
Cut vegetables according to your recipe. Shredded vegetables (like cabbage for sauerkraut) release their own juices and typically don't require added brine. Whole or chunked vegetables (like cucumber pickles) need to be covered with a salt brine.
Step 2: Calculate and Add Salt
For shredded vegetables, use 2% salt by weight. Weigh your prepared vegetables, multiply by 0.02, and that's your salt amount. For a brine, dissolve 2 tablespoons of salt per quart of water.
Use non-iodized salt—sea salt, kosher salt, or pickling salt all work well. Iodized table salt can inhibit fermentation and may cause off-flavors.
Step 3: Pack Your Vessel
For shredded vegetables, massage the salt into the vegetables until they release liquid, then pack tightly into your jar, pressing down firmly after each addition. The vegetables should be submerged in their own juices.
For whole vegetables, pack into the jar and pour brine over them until completely covered, leaving about an inch of headspace.
Step 4: Weight and Cover
Place your weight on top of the vegetables, ensuring everything stays submerged. Cover loosely to allow gases to escape.
Step 5: Ferment
Place the jar in a location out of direct sunlight where the temperature stays between 60-75°F (15-24°C). Warmer temperatures speed fermentation but can affect texture; cooler temperatures slow the process but often produce superior results.
Check daily, pressing down the weight and skimming any scum that forms on the surface. This white film (called kahm yeast) is harmless but can affect flavor if left unchecked.
Step 6: Taste and Store
Begin tasting after 3-5 days. When the flavor reaches your preferred level of sourness, remove the weight, secure with a tight lid, and transfer to refrigeration. Cold temperatures dramatically slow fermentation, preserving your vegetables at their peak.
-
Ensure everything is clean but not necessarily sterilized—some bacteria are helpful
-
A kitchen scale provides the most consistent results
-
Shred, slice, or leave whole depending on the ferment type
-
Massage shredded vegetables for 5-10 minutes until juices flow freely
-
Eliminate air pockets by pressing firmly after each addition
-
Add extra brine if needed—vegetables must stay below the liquid line
-
Use appropriate weight that keeps vegetables down but fits your vessel
-
Consistent temperature produces the best results
-
Active bubbling is a good sign—it indicates healthy fermentation
-
Personal preference varies—some like mild tang, others prefer full sour
-
Cold storage can preserve ferments for 6 months or longer
Foolproof Fermentation Recipes for Beginners
These three foundational recipes will teach you the core techniques of vegetable fermentation. Master these, and you'll have the skills to ferment virtually any vegetable from your garden.
Classic Sauerkraut: The Perfect First Ferment
Sauerkraut is the ideal starting point for new fermenters. It requires just two ingredients, tolerates a wide range of conditions, and produces consistently excellent results.
Ingredients: - 1 medium head green cabbage (about 2 pounds) - 1 tablespoon fine sea salt (or 2% of cabbage weight)
Instructions:
-
Remove the outer leaves from the cabbage and set one aside. Quarter the cabbage, remove the core, and slice thinly (about ⅛ inch). A mandoline makes quick work of this, but a sharp knife works fine.
-
Place the sliced cabbage in a large bowl and sprinkle with salt. Begin massaging the salt into the cabbage, squeezing and kneading firmly. Continue for 5-10 minutes until the cabbage releases significant liquid and becomes limp and translucent.
-
Pack the cabbage into a clean quart jar, pressing down firmly after each handful. Pour any liquid from the bowl over the cabbage. The cabbage should be submerged under its own liquid with at least an inch of headspace.
-
If there isn't enough liquid to cover, make a small amount of 2% brine (1 teaspoon salt dissolved in 1 cup water) and add just enough to cover.
-
Fold the reserved cabbage leaf and press it down on top of the shredded cabbage, then add your weight. Cover loosely.
-
Ferment at room temperature for 1-4 weeks, tasting periodically. When it reaches your preferred sourness, refrigerate.
Flavor Variations: Add caraway seeds (1 teaspoon), juniper berries (6-8), or thinly sliced apples for traditional variations.
Garlic Dill Pickles: Crunchy and Classic
Nothing says summer quite like a crisp, garlicky pickle straight from the garden. This recipe produces half-sour pickles in about a week—crunchy, tangy, and full of fresh dill flavor.
Ingredients: - 1-1.5 pounds pickling cucumbers (about 6-8 small cucumbers) - 4 cloves garlic, peeled and smashed - 2 heads fresh dill (or 1 tablespoon dill seed) - 1 teaspoon black peppercorns - 1 bay leaf - 2 tablespoons sea salt - 1 quart filtered water
Instructions:
-
Wash cucumbers thoroughly and trim ⅛ inch from the blossom end (this removes enzymes that can cause softening). If you're unsure which end is the blossom end, trim both ends.
-
Dissolve salt in water to create your brine. Stir until completely dissolved.
-
Place garlic, dill, peppercorns, and bay leaf in the bottom of a clean quart jar.
-
Pack cucumbers vertically into the jar, fitting them snugly. Pour brine over the cucumbers until completely covered, leaving 1 inch of headspace.
-
Add your weight to keep cucumbers submerged. Cover loosely.
-
Ferment at room temperature for 3-7 days. Begin tasting at day 3. Half-sours are ready in 3-5 days; full-sour pickles take 1-2 weeks.
-
Once pickles reach your desired sourness, refrigerate. They'll continue to sour slowly in the refrigerator.
Tips for Crunchy Pickles: - Use the freshest cucumbers possible—ideally picked the same day - Add a grape leaf, oak leaf, or horseradish leaf for extra crunch (they contain tannins that firm the texture) - Ferment at cooler temperatures (60-65°F) for crunchier results - Don't over-ferment—stop when they still have some brightness in color
Rainbow Vegetable Medley: Master the Mix
This colorful ferment showcases the versatility of lacto-fermentation. Use whatever vegetables your garden provides—the basic technique works for almost any combination.
Ingredients: - 4 cups mixed vegetables, cut into uniform pieces: - Carrots, sliced into coins or sticks - Cauliflower, broken into small florets - Bell peppers, sliced into strips - Onions, sliced into rings - Radishes, quartered - Green beans, trimmed - 4 cloves garlic, sliced - 1 teaspoon whole spices of choice (mustard seed, coriander, cumin, red pepper flakes) - 2 tablespoons sea salt - 1 quart filtered water
Instructions:
-
Prepare all vegetables, cutting to similar sizes for even fermentation. Harder vegetables can be cut smaller; softer vegetables larger.
-
Dissolve salt in water to create brine.
-
Layer spices and garlic in the bottom of your jar. Pack vegetables, mixing colors and types as you go.
-
Pour brine over vegetables until covered. Weight and cover loosely.
-
Ferment for 5-10 days, tasting periodically. Different vegetables ferment at different rates—the medley is ready when the slowest-fermenting vegetable (usually carrots) tastes pleasantly tangy.
-
Refrigerate when complete.
Best Vegetable Combinations: - Mediterranean: Cauliflower, bell peppers, garlic, oregano, lemon zest - Asian-inspired: Carrots, radishes, ginger, garlic, chili flakes - Garden Classic: Carrots, green beans, dill, garlic, peppercorns - Autumn Harvest: Beets, carrots, onions, caraway, bay leaf
Common Fermentation Mistakes to Avoid
Even experienced fermenters occasionally encounter problems. Understanding common mistakes helps you avoid them—and troubleshoot when things don't go as planned.
Mistake #1: Vegetables Floating Above the Brine
This is the most common cause of fermentation failure. When vegetables are exposed to air, they can develop mold or become soft and unpleasant. The brine creates an anaerobic environment essential for safe lacto-fermentation.
Prevention: Use appropriate weights that keep all vegetable matter submerged. Check daily during active fermentation and press down any floaters. If needed, add more brine (2% salt solution) to maintain coverage.
If It Happens: If mold develops on exposed vegetables, remove and discard the moldy pieces along with an inch of the vegetables below. If the remaining submerged vegetables smell and taste normal, they're safe to continue fermenting. If the entire batch smells off, discard and start fresh.
Mistake #2: Using the Wrong Salt
Iodized table salt contains anti-caking agents and iodine that can inhibit beneficial bacteria and create off-flavors. Some salts also contain dextrose or other additives.
Prevention: Always use pure salt—sea salt, kosher salt, or pickling salt. Check the ingredients: it should list only salt, or salt and naturally occurring minerals.
Mistake #3: Incorrect Salt Ratios
Too little salt allows harmful bacteria to compete with beneficial ones, potentially resulting in mushy vegetables or unsafe ferments. Too much salt slows fermentation dramatically and produces overly salty results.
Prevention: Weigh your vegetables and use 2% salt by weight for most ferments. This means 20 grams of salt per 1000 grams of vegetables. For brines, use 2 tablespoons salt per quart of water.
Mistake #4: Fermenting at Extreme Temperatures
Above 80°F (27°C), fermentation happens too quickly, often producing mushy textures and harsh flavors. Below 55°F (13°C), fermentation may stall entirely.
Prevention: Find a spot in your home that stays between 60-75°F (15-24°C). Basements work well in summer; a cool corner away from heating vents works in winter. An oven with only the light on provides a stable environment in cold homes.
Mistake #5: Using Poor Quality or Old Vegetables
Fermentation can't rescue vegetables that are past their prime. Limp, dehydrated, or damaged vegetables produce inferior ferments with soft textures and weak flavors.
Prevention: Use the freshest vegetables available, ideally harvested within 24-48 hours. Store vegetables properly before fermenting—cold and humid for most. Fermentation is preservation, not resurrection.
Mistake #6: Sealing Jars Too Tightly During Active Fermentation
Active fermentation produces significant carbon dioxide. Sealed jars can build dangerous pressure levels, potentially causing jars to crack or explode.
Prevention: Always use loose-fitting lids, cloth covers, or airlock systems during active fermentation. Only seal tightly after transferring to refrigerator storage, when fermentation has essentially stopped.
Mistake #7: Confusing Kahm Yeast with Mold
Kahm yeast forms a white, wrinkled film on the surface of ferments. While unappealing, it's harmless. True mold is fuzzy, often colored (blue, green, black, or pink), and can penetrate into the ferment.
Prevention: Keep vegetables submerged and skim any surface growth regularly. Kahm yeast is more common in warmer temperatures and with sweeter vegetables.
Knowing the Difference: - Kahm yeast: Flat or wrinkled white film, not fuzzy, harmless but can affect flavor - Mold: Fuzzy, often colored, can indicate problems; remove affected portions - Sediment: White sediment at the bottom of the jar is normal—it's dead bacteria and is harmless
Mistake #8: Giving Up Too Soon
Many new fermenters panic at the first sign of bubbling, cloudiness, or unusual smells. These are all normal signs of active fermentation.
Prevention: Understand what healthy fermentation looks like: active bubbling, cloudy brine, slightly funky smells that are different from spoilage. Trust the process. If your ferment smells like pickles (even strong pickles), it's working. If it smells rotten, like garbage, or makes you recoil—that's when to discard.
Best Practices for Successful Fermentation
Beyond avoiding mistakes, these expert practices will elevate your fermentation results from good to exceptional.
Start with Quality Ingredients
The quality of your fermented vegetables directly reflects the quality of your starting ingredients. Organically grown vegetables from healthy soil tend to host more diverse and vigorous populations of beneficial bacteria, resulting in more complex flavors and more reliable fermentation.
Harvest vegetables in the morning when they're most hydrated. Process them the same day whenever possible—every hour between harvest and fermentation allows quality to decline. If you must store vegetables before fermenting, keep them cold and humid.
Master Your Environment
Consistent temperature produces the most reliable results. Dramatic temperature swings can stress the bacterial cultures and create uneven fermentation. Find the most stable location in your home—often a basement, interior closet, or cabinet away from exterior walls.
During summer, you might need to ferment in a cooler location or for shorter periods. During winter, finding a warm enough spot can be challenging. Some fermenters use coolers with warm water bottles for temperature control; others invest in fermentation heating mats.
Keep a Fermentation Journal
Record keeping transforms fermentation from guesswork into a repeatable craft. Note the vegetables used, salt amount, temperature, start date, tasting notes, and final refrigeration date for each batch. Over time, you'll identify patterns and dial in your preferred techniques.
Include observations about each batch: How active was the bubbling? How quickly did sourness develop? What was the final texture like? These details help you troubleshoot problems and replicate successes.
Fermentation is not an exact science. It's a conversation between you and trillions of microorganisms, and like any good conversation, it requires attention, patience, and a willingness to learn.
Build Your Fermentation Schedule Around the Seasons
Different vegetables peak at different times, creating a natural fermentation calendar. Early summer brings cucumbers and radishes; late summer offers peppers and tomatoes; fall provides the cabbage and root vegetables that will sustain your fermentation practice through winter.
Plan your fermentation activities around your harvest. Designate specific days for processing large batches, and maintain a rotation of ferments at different stages—some just started, some ready to taste, some mature and refrigerated.
Taste Frequently and Trust Your Palate
There's no universal "done" point for fermented vegetables. Some prefer a bright, mildly tangy ferment pulled after just a few days. Others love the deep, complex sourness that develops over weeks. Your palate is the ultimate judge.
Taste your ferments at least every other day during active fermentation. Note how the flavor develops and evolves. Pull ferments when they taste right to you, regardless of what any recipe timeline suggests.
Invest in Proper Storage
Refrigeration essentially pauses fermentation, but your ferments will continue to evolve slowly. Properly stored fermented vegetables maintain their quality for six months or longer, though most households consume them much faster.
Use airtight containers in the refrigerator to prevent your ferments from absorbing other odors. Glass jars with tight-sealing lids work best. Keep vegetables submerged under brine even during storage—use a smaller jar or fermentation weight if needed.
Expand Your Skills Gradually
Once you've mastered basic vegetable ferments, a world of possibilities opens. Consider exploring:
Fruit Ferments: Fermented hot sauces, chutneys, and fruit preserves
Condiments: Fermented ketchup, mustard, and salsa
Beverage Ferments: Kvass, tepache, and other vegetable or fruit-based drinks
Advanced Techniques: Extended fermentation, blending ferments, using whey or other starters
Each new category builds on the foundational skills you develop with simple vegetable ferments. The same principles of salt ratios, temperature control, and keeping foods submerged apply across all lacto-fermentation.
Frequently Asked Questions About Home Vegetable Fermentation
Conclusion
Home vegetable fermentation represents one of the most satisfying bridges between your garden and your table. With nothing more than fresh vegetables, salt, and patience, you can transform your harvest abundance into probiotic-rich foods that nourish your body, delight your palate, and connect you to a tradition stretching back thousands of years.
The skills you develop as a home fermenter—reading your vegetables, understanding bacterial cultures, learning to trust the process—deepen your relationship with food in ways that no grocery store purchase ever could. Each jar represents not just preserved vegetables, but your growing expertise and connection to the seasons.
Start simple. Make a batch of sauerkraut this week. Watch the transformation happen on your countertop. Taste it as it develops from raw cabbage to tangy, complex kraut. And when you serve that first forkful alongside a meal, know that you've joined the countless generations who have practiced this same alchemy.
Your garden's abundance doesn't have to end with the growing season. With home vegetable fermentation, summer's harvest can nourish you all year long. Welcome to the fermenting community—we're glad you're here.
Ready to Grow Your Own Fermentation Ingredients?
Discover the best vegetable varieties for fermentation and learn how to plan your garden for year-round preservation. From pickling cucumbers to storage cabbages, we'll help you grow the perfect fermentation crops.
Explore Our Vegetable Growing Guides
Comments
No comments yet. Be the first to comment!
Leave a Comment